Featured

What sort of Mac will run Logic Pro properly?

I see this sort of question coming up all the time – especially on social media. Will my (insert model here) Mac be good enough to run Logic Pro? That kind of thing. Regular group participants get sick of this type of question. So here’s my version of an answer to it.

Almost any Mac will run a version of Logic Pro, but maybe not the latest version of Logic Pro.

Update Feb 2022

MacOS Monterey has been out for a few months now, and Apple have released several more Apple Silicon-based devices. One of the features of the new updated M1-Pro and Max chips are increased memory size, which lays to rest some of the issues people had with purchasing them for pro audio and video tasks. There are numerous YouTube videos comparing performance of the different MI-based models and with the Intel-based units, and the M1-Pro and Max based systems kick ass. There’s still some compatibility issues though – see below.

As of Feb 2022 only Big Sur and Monterey are the supported MacOS versions. So for a start you need to make sure your Mac will run one of these versions. Ideally the very latest version for additional future-proofing. I’m currently running Monterey and it only broke a couple of less-used audio plug-ins. I kept an image of my Big Sur system just in case.

Get MacTracker to see what your existing or potential-purchase Mac is compatible with. Then you can think about your actual hardware details.


Note that Apple are still in transition between Intel chips and their own Silicon-based products. Intel is currently better for compatibility purposes with existing hardware/drivers/apps/plug-ins, but is more expensive and runs hot/consumes power. Apple Silicon is very fast, runs cool and is cheaper than Intel equivalents, but is not natively supported (yet) by some hardware/drivers/apps/plug-ins.

General consensus seems to be that getting M1-based Mac now is generally fine (still a few incompatible things yet) but will likely be even better and more compatible in the future.

Whichever model Mac you have or intend to get, there are three aspects to focus on:

  1. CPU type, speed and number of cores. If you’re not just going for a speedy M1-based Mac (and to be honest, right now I’d go that way) , then it’s an Intel-based system.
    There are various model types, but for pro audio you’re going to need as many CPU cores as you can get – with at least four. Avoid the dual processor Intel i5s as they often don’t even do hyper-threading (virtual cores). NB. Some later laptop i5 versions do. Other models of Intel CPU have two virtual cores for each real one, so if you have four real cores you get 8 virtual cores. This improves processing efficiency through multi-threading (eg running application processes in parallel). CPU speed does make some difference but not as much as it used to. You’re probably better to go with more cores and slightly slower max speed if it’s a choice between the two.
  1. Storage (aka Hard Drive/SSD) size. This should be enough to be useful, as it is becoming impossible to upgrade later in many new models. I wouldn’t go less that 1TB now. And 2TB would be even better if using large sample libraries etc. I run both Logic and Ableton Live and the combined full factory libraries of these two alone are nearly 200GB. Note also that SSD wear is lower on larger size drives, so conceivably they will last longer.
  1. Memory (aka RAM). When you run apps/sample libraries etc, they are loaded into RAM. When your RAM runs out of space, data is swapped out to Storage/Hard Drive as you switch between threads, apps or documents. It happens all the time regardless, as the OS will always try to keep the RAM full, but if it’s happening too much your computer will struggle and be slow. Nb This is also why upgrading your old hard drive to a sprinty SSD can make such a big difference. So in regards to memory, 16GB would be the minimum and ideally it would be 32GB or more for those using large orchestral sample libraries. It’s not unheard of for composers to be running Mac Pro’s with dual 12-core Xeon processors and 384GB of RAM. I use 16GB with several sample libraries loaded and it’s mostly fine.

Don’t get confused between Storage and Memory, even though they appear similar and are becoming blended together somewhat within the Apple Silicon systems. In other words, if you get warning messages about memory running out, don’t start deleting files and plugins from your storage system (unless your hard drive/SSD is almost totally full!).

So which model type should you get (if you don’t already have one now). Whether you get an iMac, Mac Mini, Mac Book Pro or Mac Pro comes down to the performance you want and where/how you will use it.


If you’re planning on performing live or you travel a lot, then a laptop is very useful, but you’ll want to max out some of the specs as much as you can afford – ideally get plenty of storage. You can often get away with a small screen if you use an external monitor, but 15″ or more is best for live use. Mac Book Pro hardware is better than plain Mac Book or MB Air and has more connectors. Expensive – but if you have one you’ll never want to not have one. If you know what I mean? Personally, I’d go for an Apple 16″ MBP M1-Pro with 10-core CPU, 16-core GPU and 16-core Neural Engine, 32 GB Unified Memory and 1TB of storage. The 16″ models apparently run cooler/quieter. But that’s just me after watching numerous videos on which is best for audio.

For home systems, iMacs are pretty good value as you get a nice built-in screen, and some models are upgradable in regards to memory or storage. Basically just pick the screen size you want and the optimum specs for the items above.

If you already have a decent screen, the Mac Mini is very good value (I have the 6-core Intel model). The downside with these are that they don’t have a separate graphics card/chip so they struggle with lots of large monitors and graphics-heavy apps. I find that I sometimes get graphics corruption after running Logic for a while, and it’s like a fan heater when running large Logic sessions. I’m hanging out for a new grunty M1-Pro based model to replace it for my studio.


For rich, serious or pro users (perhaps those running professional studios) the Mac Pro might be a useful investment as they can be upgraded and can also accept PCI-e cards – useful for certain high-end audio interfaces, RAID arrays etc.

But with the rumoured upcoming high-performance Apple Silicon-based Mac Pro on the horizon, it might be worth waiting to see what comes out next.

Featured

In Case You Missed It – New-ish Cool Stuff in Logic Pro X v10.2-10.3.3

Even as a long-term experienced user, it’s hard to keep up with all the latest tweaks and additions to Logic Pro X. Especially as the updates are infrequent, but often chock full of cool stuff – some of which can be buried at the bottom of a huge list (never mind the occasional undocumented feature). Some are merely cosmetic or processor-efficiency improvements but some of these updates could change the way you use Logic if only you were aware of them. Very few Logic Pro users that I know bother to trawl through the release notes for each update. Luckily I do, so here’s a list of some of the cool things that were added over the last year or so.

Transpose and reverse audio regions.

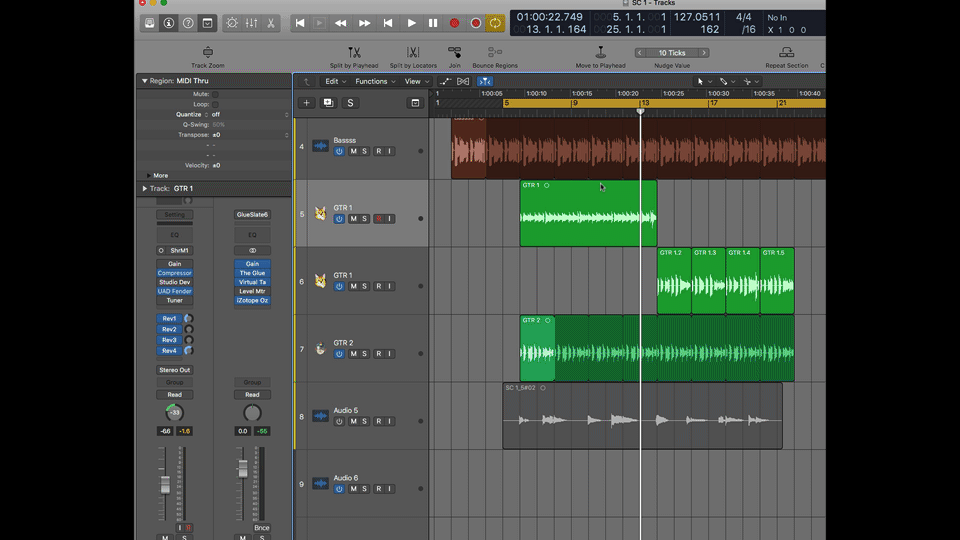
In case you missed it, there’s a couple of extra things in the region inspector pane for audio regions. You can now transpose (in semitones and cents) any audio region (it doesn’t need to be an Apple Loop). You can also reverse playback with a tick-box, and depending on other variables like whether it’s recorded or imported; change speed, follow tempo changes etc.

Reverse Audio

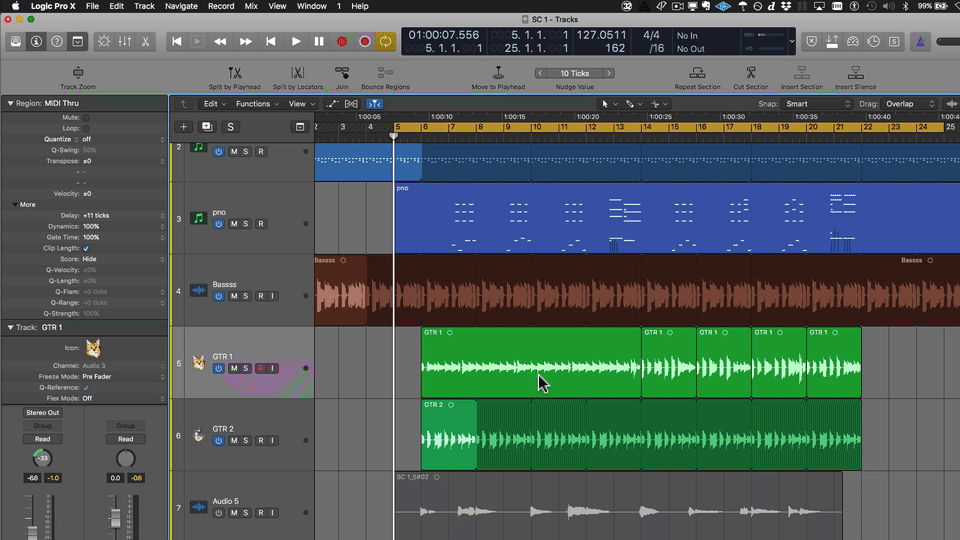
Reverse is pretty simple and just plays the file backwards, but transpose uses the Flex engine (if you haven’t ticked “Follow Tempo and Pitch”) so there can possibly be some artifacts depending on the Flex mode chosen.

Transpose Audio

Change Speed only seems to work if you have selected “Follow Tempo and Pitch”, in which case like with Apple Loops you can go from 1/8th speed to 8x speed. Crazy.

Audio Speed

Channel Strip Stereo Pan

One of the problems with producing music with audio instruments is that they all tend to be fully stereo. If you dial up one of Logic’s grand pianos for example, it will usually have the low notes panned to the left and the high notes to the right. This sounds impressive if there’s very little else in your mix, but otherwise it can clutter the mix as well as making the left side bass-heavy.

If you use the pan knob on the channel strip, it’s actually a “balance” control for stereo instruments. So in the case of the stereo grand piano, if you turn the balance to the left, it’s not moving the entire piano to the left, it’s turning down the high notes panned to the right and only giving the low notes panned to the left. That’s not good, unless you actually want this to happen. Maybe you have an over-playing pianist and actually want to remove some of the low bass piano notes by balancing to the right.

But if it is a problem, the usual way of dealing to this issue in Logic Pro is either to use a mono version of the instrument (you can substitute it at the top of the plug-in menu without losing your current instrument settings), or you can insert Logic’s “Direction Mixer” plugin which gives you much more control over the width and rotation.

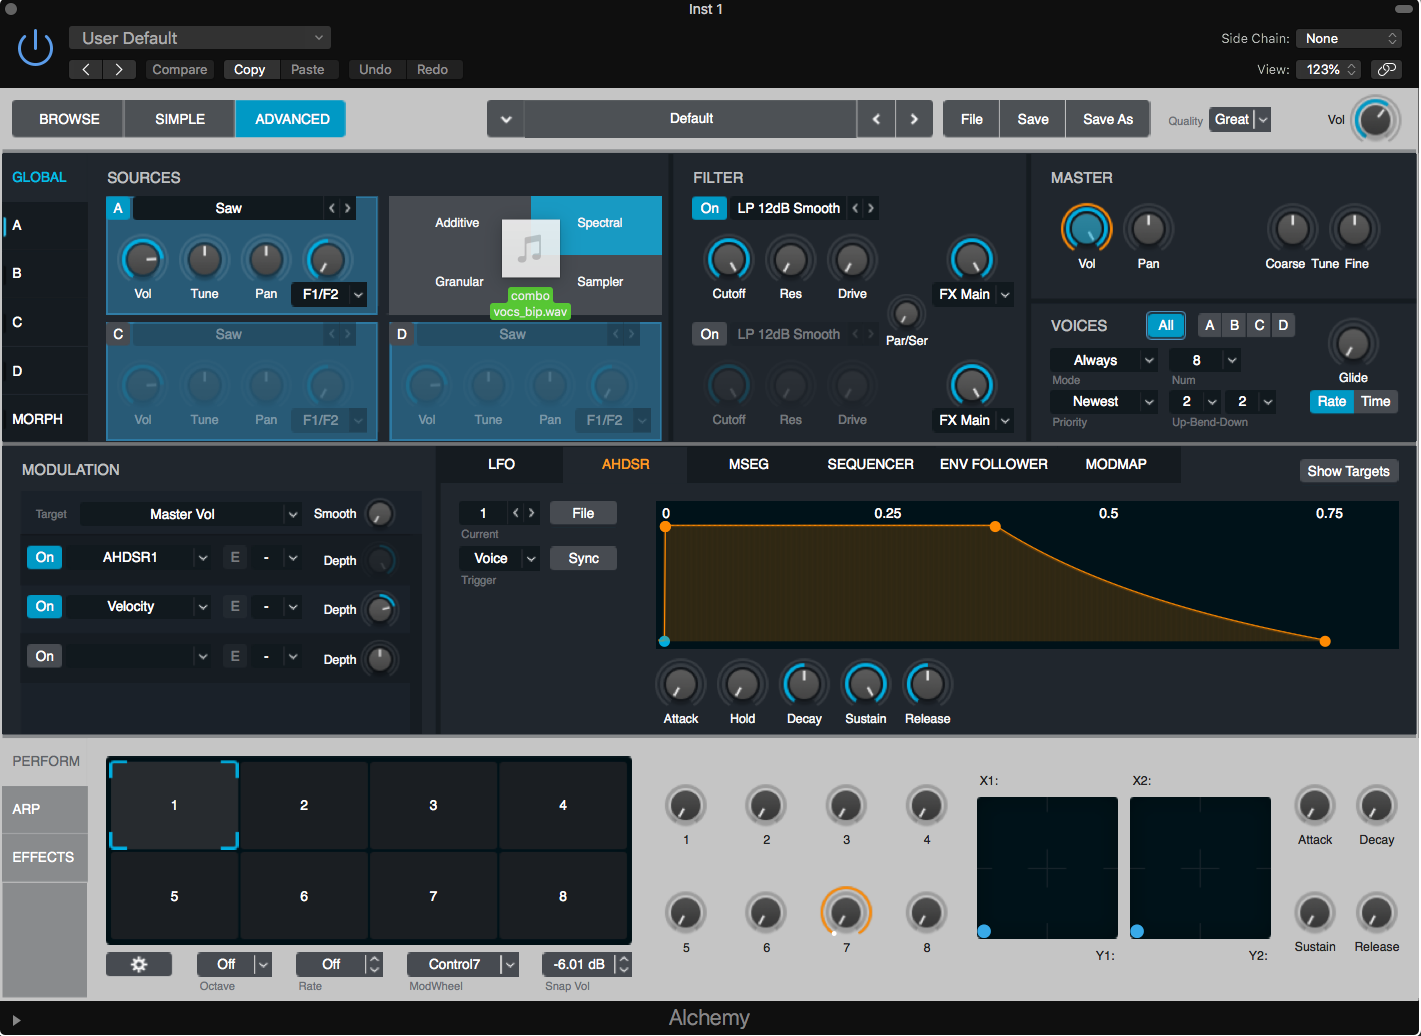
But now Apple has added an extra feature to Logic – a stereo pan control. If you right-click on a Balance knob, you can select “Stereo Pan” instead. (Note that there’s also a cool “Binaural” mode which has been in Logic almost forever but might be useful again now that surround is becoming a thing outside of film).

Once you have accessed the stereo pan control – you can click and drag in the middle of it to move your entire stereo image left or right – that’s moving both sides of the piano left or right now. Try it and see – it sounds a lot richer than the old balance control. If you carefully click in the top centre of the little highlighted ring, you can drag up to make it more mono. You can Command-click on it to flip the left and right sides as well (the ring will turn orange).

Mid-Side Audio Plugins

The last couple of years has seen a bit of a trend in mid-side mode, mainly coming from the mastering scene. Mid-side gives the ability to process the center and outsides of a stereo track or buss separately. For example in a stereo drum buss you could EQ the center differently to the sides – maybe your cymbal crashes are too harsh but you still need that presence on the snare. Or maybe you could limit only the outsides of the drum mix to control the panned cymbal crashes. It’s also obviously darn handy for directly decoding recordings done in M/S mode. This functionality has previously only been available by purchasing third-party plugins that include this feature, or by some complicated mixer bussing trickery.

Mid-Side Plugins

Logic has now given us the ability to directly insert ANY stereo audio plugin as mid-side. In fact what you do is insert it as “Dual-Mono” first, which gives you the ability to independently control each channel, then you can switch it to “Mid-Side”. You can also “Couple” both channels to make it convenient to set up an overall sound before tweaking each channel separately.

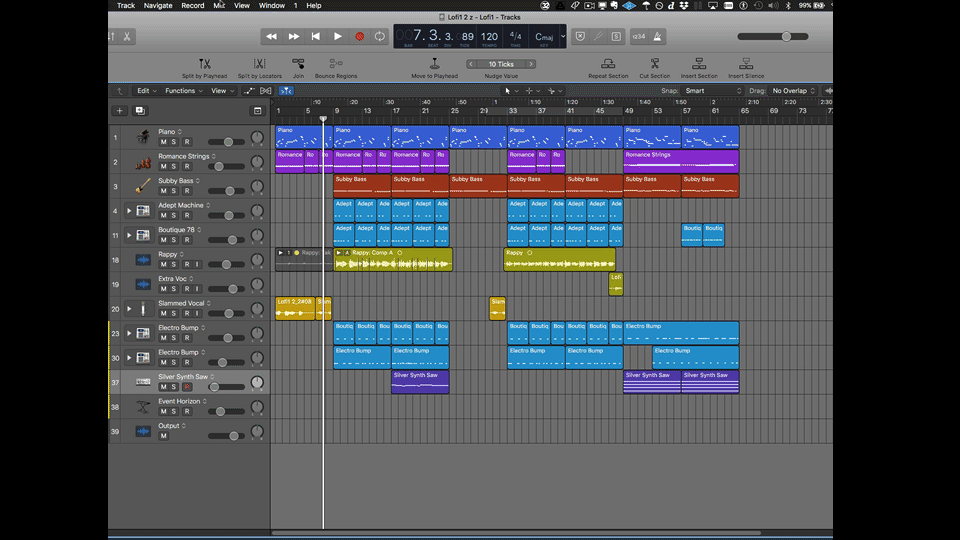
Duplicate Track with Contents

Hopefully you already know you can click on the little drop-shadowed “+” button to create a duplicate track of the selected one with same settings. If you Command-click on it, it will also duplicate the contents of the track.

This is super-handy for “checkerboarding” regions across two tracks. I use it often to separate single instrument tracks into a verse/chorus/bridge chunk so I can treat each track/section slightly differently with levels, effects, and EQ. Much faster and simpler than basic section automation.

Duplicate Content

They’ve tweaked this a bit so that the duplicated regions are unique (when they first introduced this feature any region edits on the duplicate would also happen on the original track – awkward).  Also – if you now duplicate an armed track, the duplicate will be armed, not the original, so it’s all ready to record.

Note that you can also Option-drag a track header to duplicate it with contents.

Selection-Based Processing

Logic users have been crying out for this for years (and Pro Tools users have often scoffed at Logic’s lack of this feature), but now it’s here not many people even know it exists. Actually – I just have to mention that very early pre-Apple versions of Logic actually DID have region-based Audiosuite capability.

So now you can (again) make a selection on an audio region, then apply a plugin or set of plugins to it. Double-click on a region to open it in Track View. Then go to Functions/Selection-Based Processing.

Selection-Based Processing

The dialog that opens gives you two plugin chains that you can toggle between, plus a bunch of rendering options. There’s some generic presets already provided, but be careful, as sometimes the mono/stereo aspects may not match your file. It will still sound okay, but can be messy having a processed chunk that is, for example, stereo on a mono track.

It would be advised to individually add your own plugins and tweak them, and then save them for use later. Note that there’s also a key command to repeat the last processing – very handy for repairing or processing lots of the same sort of thing in a track.

Track Alternatives (Like Pro Tools’ Playlists)

This is one of my most-used and favourite features since its introduction. I’ve also found it’s especially handy for dealing with Take Folders.

First you have to make sure the view option is turned on for “Track Alternatives”. You can do that either with the Track Header settings, or using the Track menu.

Just like with Pro Tools playlists, you can either duplicate a track, or create an empty track. Using the little bracket menu on each track header you can even view all of a track’s alternatives at the same time (Or by using Option on the menu you could see every track’s alternatives at the same time) so you can move or copy things things around if needed.

Here’s what I like to use it for;

Say you’ve got a vocal comp in a Take Folder.

Duplicate the track. Now you have Alternative <B>. Flatten the take folder. Now you can easily tidy up breaths and fix tuning if need be. Later if you realise you used a wrong selection in the comp, you can select the original Alternative <A> and then duplicate again to give you <C>. Now flatten this version of the Take Folder and use that instead. Or simply cut and paste the correct part across to Alternative <B>.

It helps if you actually name the alternative tracks as well rather than just leaving the default track name with “A”, “B” etc.

Previously I used to use a duplicated (muted) Hidden track for this vocal comping safety copy, but the Track Alternative system is much more graceful and convenient.

Drummer Apple Loops.

This addition of Drummer loops to the Apple Loops library is a much better way to find the right sort of Drummer groove for your project.

Rather than the old slow method of creating a Drummer track, selecting a style, selecting a drummer, checking their various beats, changing to another drummer, checking those beats etc, you can just preview the beats directly in the Apple Loops browser.

Drummer Loops

Then, like all Apple Loops, you can simply drag your Drummer Loop into the Main Window in Logic to create your Drummer track. This is so much faster.

Recently, three more percussion-based Drummers were added to Logic.

Bonus tip: If you prefer your own custom Drummer grooves/kits – you can drag a Drummer region onto the Apple Loops browser to create your own Drummer loop library.

Recently-Used Plugin List

This can now be turned off in the preferences, but I find it incredibly handy. You can also use the plugin manager to not only sort things into folders, but also add essential plugins to appear just under the Recent list under “Top Level”.

Plugin Manager

Undo an early edit without undoing all the bits in-between

An oldie-but-goodie – this allows you to go back to an earlier edit without also losing a bunch of stuff in-between now and then. For example, let’s say you deleted an un-needed MIDI region, then spent 15 minutes editing some MIDI notes in another region, then decided you actually still needed that first region. You could keep hitting “undo” until you got back to where you deleted the region, but then you lost all the editing in-between.

Undo History

In Logic’s menu Edit/Undo History you can Command-click on a previous undo and only undo that single item by itself. Logic will warn you that the universe may implode if you try it, so beware.

Automatically create a fade-out on the Main Output.

To get a basic 10-second fade at the end of your project, go and select the menu item Mix/Create Track Automation/Create Volume Fade out on Main Output.

Main Output Fade-out

Change speed of entire Logic Project (including audio) using Varispeed

This has actually been in Logic from waaaay way back (version 9?), but as most Logic users that I meet don’t know it even exists I’m adding it in here anyway – plus it sounds a lot better in the latest versions of Logic.

Add “Varispeed” to the Control Bar by right-clicking in a blank part of it and adding via “Customize Control Bar and Display”. This adds two things – a “+-” button to toggle Varispeed on and off, and the actual Varispeed controls in the display itself.

Varispeed Controls

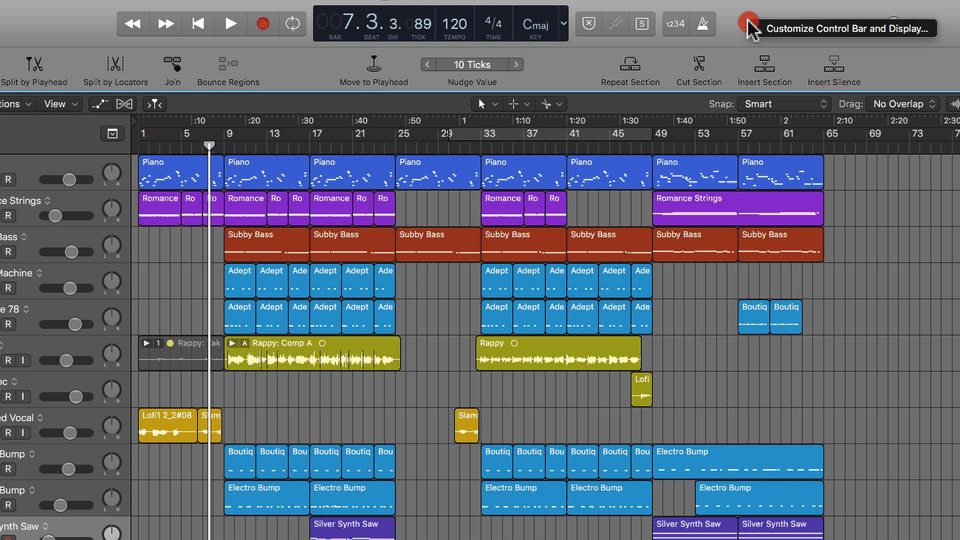
There’s a bunch of options for whether you want to change just speed or speed and pitch (and whether to include MIDI in pitch changes), how you want to measure the changes (eg BPM, percentage) etc. Check Logic’s help menu for full details.

This is very handy for tweaking overall tempo slightly if the song isn’t quite gelling properly, or for helping make the length fit an exact time. Also very handy for slowing the song down temporarily to record a tricky part, then speeding back up again.

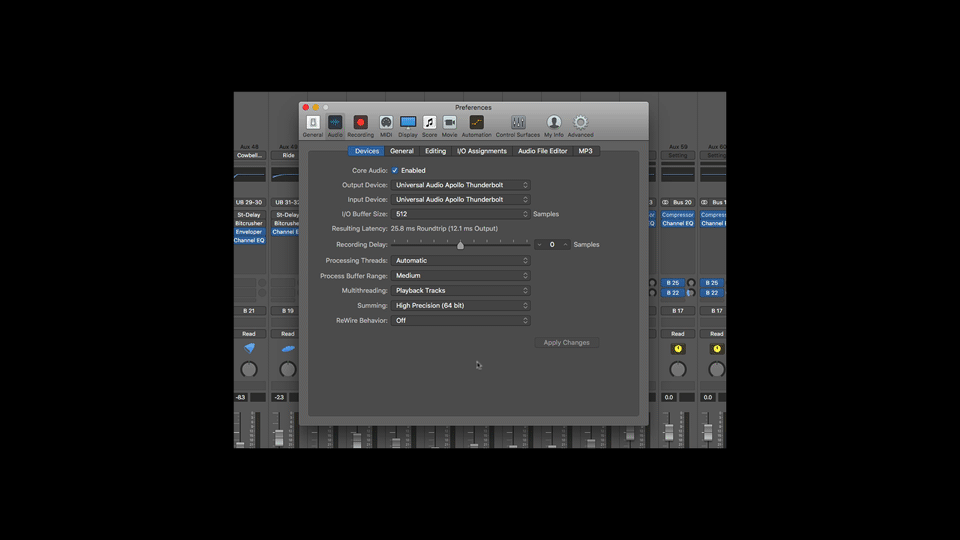
High-Precision 64-Bit Mixing

Most DAW mix busses use 32-bit floating-point summing, which gives a ridiculous amount of headroom for mixing all those tracks together (Around 1,500dB of headroom). However it does leave something to be desired when summing a range of different track levels together as there is a “scaling” error that can creep in. Using the 64-bit mixer increases the resolution of the summing bus and reduces some of this error, potentially improving the overall sound quality. Select the 64-bit option under Logic/Preferences/Audio

64-Bit Summing

Brush Tool in Piano Roll

This cool new tool was added back in version 10.1 but some people haven’t discovered it yet. It’s really handy for drawing repeated kicks, snare or hihats and like a Photoshop brush, you can make it remember a bunch of notes (and other MIDI events) and draw that shape. This can be handy for repeating drum fills, or even copying an orchestral arrangement elsewhere or adding a harmony line.

In standard format the tool draws notes on a grid based on the quantize setting set at the side the piano roll window. It can be hard to draw along a straight line (especially if your workflow includes drinking wine) but if you don’t let go of the mouse button you can back up and redraw any notes that are wrong. Once you let go of the mouse button, the tool now switches to an eraser if you hold it over notes, so it’s easy to swipe-erase as well.

Brush Tool

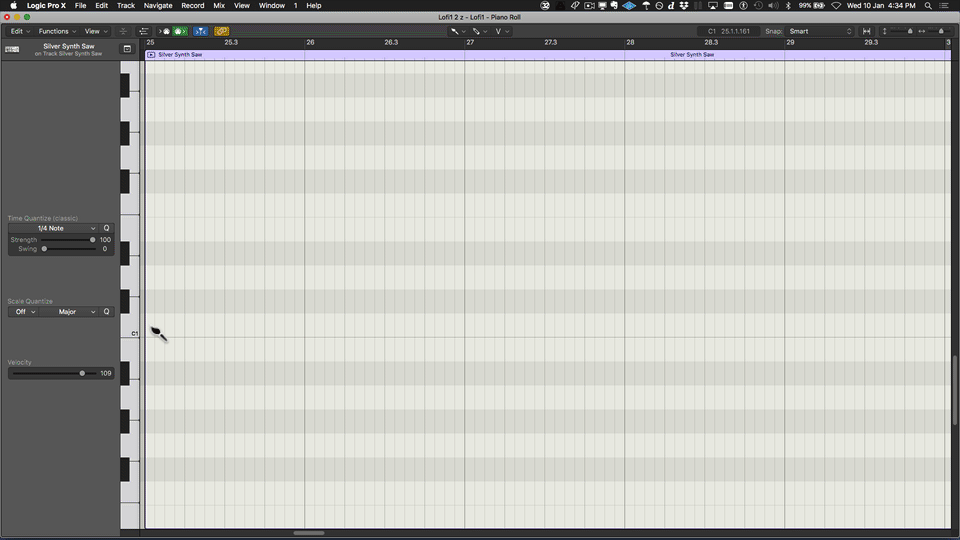
To program a set of notes into the tool, (make sure you’re not using the brush tool or you’ll just draw instead of selecting) select some notes, switch to brush tool, then control-click on the background and select “Define Brush Pattern”. Now when you draw, all those saved notes will be revealed as you drag out the mouse. You can start anywhere to transpose, and even draw backwards to get the reverse pattern. Try it – it’s pretty cool. You can reset the brush pattern by following the steps above and selecting “Reset Brush Pattern”.

Modulator MIDI Plugin can control audio plugins on the same channel strip

This is a actually pretty cool, and a really fast way to get some variety going on without doing proper automation on a track. One of the things I like to use it on is to automatically switch the Leslie speeds on an organ track, but you can make it learn any audio plugin parameter.

Modulator

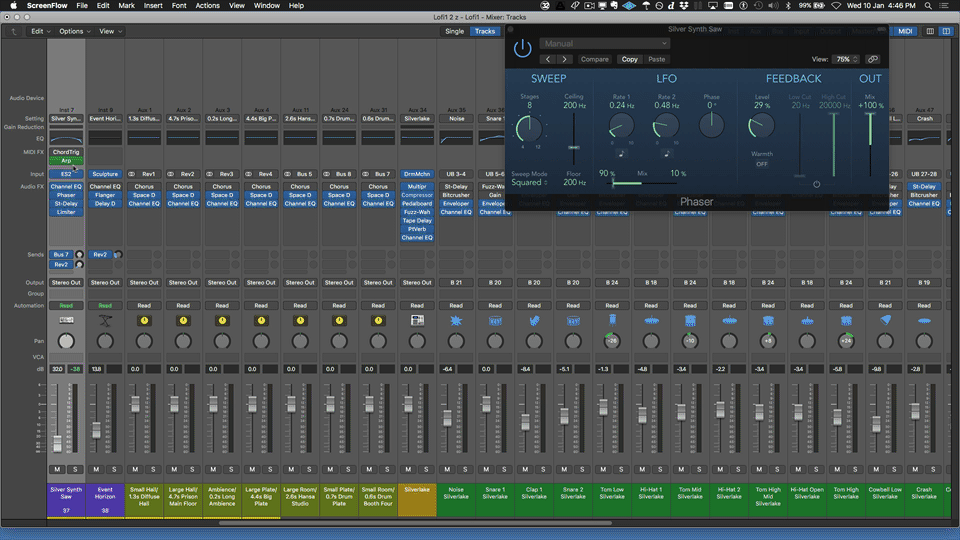
In some ways it’s a bit like Pro Tools’ modulated automation pen tool, but in a plugin. It’s a pity you can’t use it on audio tracks – only instrument tracks have the MIDI plugin slot. Now if Logic just expanded their MIDI patching capabilities to include MIDI busses and/or sidechains…

Arpeggiator MIDI plugin can now export input (source) material as well as output (arpeggiated).

The arpeggiator is a pretty fun MIDI plugin. You might have noticed that while it’s running you can drag the little highlighted box onto a MIDI track to obtain the actual arpeggiated MIDI data.

Well now you can also grab what’s coming INTO the Arpeggiator as well – there’s an extra little box there now.

Arp Grab

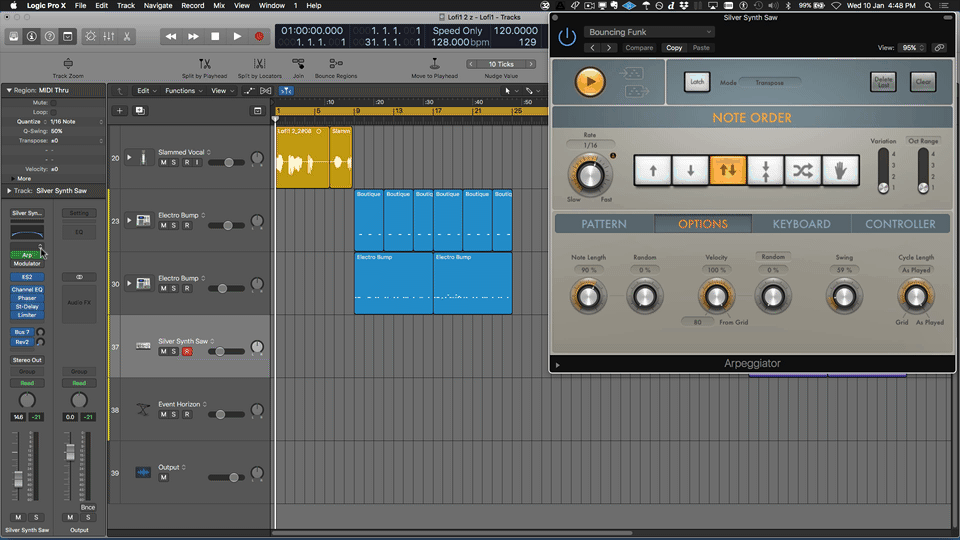
What this is really handy for is for grabbing a chord out of the Chord Trigger MIDI plugin. If you’ve ever jammed through the Chord Trigger but then decided the chords are close but not quite what you wanted, it’s a real pain to manually analyze them, and then input the correct chords. Now you just make sure you have the Arpeggiator inserted after the Chord Trigger and just play, whilst dragging Arpeggiator’s little “Input” box onto a MIDI track. You can deselect the Play button on the Arpeggiator if it annoys you.

Also – in case you haven’t tried it yet – the Arpeggiator has a “swing” function which is cool.

Custom Icons on Track Headers

Actually we have had the ability to add custom icons to Logic’s track headers for years, but it was a pretty involved process that required creating the correct size TIFF files, allocating them an unused file number, and then putting them into the correct folder on the hard drive so Logic could then find them. Nobody had time for that.

Now you can just drag an image file from your hard-drive or even something like Google images onto a track header and Logic will do all that other stuff automatically. It might look a bit shitty depending on the source file, and of course there’s copyright issues, but you get the idea. It’s best if it has a transparent background too.


What’s New in Logic Pro v10.7

As always with major version releases, there’s a bunch of new features, a bunch of enhanced features, and heaps of bug-fixes. Also in this release, there are improved optimisations for Apple Silicon on the fancy new Mac Book Pros that were just released. So, is it worth the upgrade – especially considering you need to have at least MacOS Big Sur to get it? Overall I think it is.

If you go to Apple’s official release notes here, it’s dominated by bug fixes, so here’s a slightly tidier version that highlights the interesting bits slightly more.

The first thing that hits you with this new release are the visual changes – some of it inherited from running within Big Sur (or Monterey), but there’s additional tweaks with look and feel and control bar icons and the like.

Logic Pro 10.7 Main Window
Logic Pro v10.7 Main Window

Other than that – here’s a list of the main feature updates, and also some other interesting bits teased out from the release notes. Plus a few things I’ve discovered myself.

Spacial Audio and Dolby Atmos workflow and export.
Also known as “immersive audio” or “immersive music”. This is pretty major.

Although Logic Pro has incorporated surround and binaural features since the early versions, this is much more up-to-date and enhanced, and is designed to help provide Dolby Atmos compatible music mixes to match Apple’s enhanced audio features in hardware (and on the Apple Music store).

In light of this, Logic Pro’s tracks can either be part of the surround “bed” or be one of up to 118 Dolby Atmos pan-able “objects”.

The beauty of Atmos is that the 3D mix space can be mapped to whatever the listener’s system has, plus you can have any movement automation of your objects mapped as well. It’s pretty cool and it also works really well with just headphones and earbuds, giving a sense of space and “3D” sound.

You can set your export and monitor settings to a range of outputs – anything from stereo, binaural for headphones, and various surround formats up to 7.1.4 (7 main/surround speakers, 1 sub/LFE, 4 height speakers). This is performed by the special Dolby Atmos encoder bundled into Logic Pro.

There’s also expanded pan controls on each channel strip to match this setup. 13 Logic plug-ins have been updated to deal with up to 7.1.4 channel formats. Export for Apple Music is via a special ADM BWF file.


You can now set the MIDI-In port and channel in the Track Inspector,
plus you can also select a separate output MIDI channel. This may not seem like much, but it is huge long-asked-for feature for those of us running multiple MIDI controllers, or for shared jamming into a single Logic project. You used to have to go and wrestle with Logic’s MIDI Environment to be able to do this, and it was not always the most reliable (it was actually pretty horrible) when it came to Logic placing the MIDI regions on to the correct tracks after a recording pass.


MIDI 2.0. This is a pretty huge update as it provides a lot of extra features under the hood, but you won’t see much of a difference until you start using controllers and instruments that are compatible with the MIDI 2.0 standard. It’s enabled or disabled in preferences and is backwards-compatible with MIDI v1.0. There’s not a lot of documentation yet about how it all really works and what you can do with it within Logic.


Additional content:
There’s some new spacial audio example/template projects.
2800+ new loops in a variety of genres and from some top producers – check out the Live Loop templates.
More than 230 new instrument and audio patches.
In the Patch Library – if you look up at the top, you can filter content to individual sound packs.
50 vintage and modern drum kits, including a collection of 808 samples.


Step Sequencer:
Step Sequencer has had a lot of love in this release. A LOT. Not only a heap of bug and glitch-fixes, but some powerful new features. If you haven’t tried it out yet, it’s actually pretty cool step-based editor for creating MIDI-based riffs and grooves. Also handy for ambient semi-random stuff as well.

There were a few issues that made using Step Sequencer a bit impractical for many MIDI uses, but they mainly seem to be fixed in this update. The two main ones are new Live Record mode for real-time capturing of note and automation events into rows – this is great! And there are now ways of managing quantise (using Start Offset) and velocity.

And it’s now possible to convert MIDI regions to Pattern regions – you could only go in the other direction before. This means you can use Step Sequencer to do some additional cool stuff to regular old MIDI regions.

Mono (one note only per column) and legato mode (adds an extra tick in length over 100% to force legato performances in synths and samplers).
Step record mode.
Sorting of rows.
Command + Option can now be used to tie steps together.
There’s a menu to delete unused rows.
Pattern Increment/Decrement controls can scale all rows in whatever the current edit mode is set to.
Option + Shift can now be used to ramp values between specified steps.

Related: Drum Machine Designer pattern tweaks:
Adjusting the Note/Octave values in a Drum Machine Designer patterns now changes the pitch of the sound rather than playing a different pad/sound.
Start Offset and Chance are now included by default in Pattern regions created for Drum Machine Designer. 
It is now possible to split a Drum Machine Designer Pattern region into individual Pattern Regions for each kit piece. Tasty.

General enhancements:
The count-in now uses the time signature of the bar where recording will start in cases where there is a time signature change at that bar. Very handy for working with eg soundtracks where there are different signatures between sections.
It is now possible to paste regions copied from multiple tracks to new tracks using a Marquee selection to define the starting track and position.
The Select Unused Tracks command now excludes tracks inside Summing Stacks.
Oh and it looks like they may have fixed the Track Sorting which used to unpack all your Summing Track Stacks as well.

Automation – lots of bug fixes, and:
You can now record Automation while recording  Audio regions (as well as MIDI regions as before).
It is easier to copy/paste automation plug-in data between tracks.
Enabling the bypass button for automation in the channel strip now dims the automation data instead of hiding it.
Automation is now reliably chased and displayed in the track header control when playback is started at any point in a project.
It is now possible to record automation with regions on the main track of a Track Stack.
Holding Option while selecting or deselecting “Record Automation with MIDI Regions” now sets all compatible channels to the setting.

Chase – various bug fixes and improved reliability, including;
Regions with Clip Length enabled no longer cause unexpected notes to be chased at the start of playback.
Note events at the start of a region are no longer chased if the left corner of the region starts after the note on.

Track Stacks – various bug fixes and minor improvements.

Flex Time/Flex Pitch – lots of bug-fixes, including;
Fixes an issue where the Reset All Flex Edits command on a set of Grouped tracks in Slicing mode could throw the regions out of sync with one another.
Fixes an issue where audio regions set to Flex: Mono mode could sometimes exhibit crackling noises after the region borders are adjusted.

Alchemy – a few bug-fixes.

Library:
You can now filter to individual Sound Packs and Producer Packs.
The Patch Merging filter remembers its previous settings when you hide it then open it again (Finally – I’ve been waiting years!)

Plug-ins – lots of bug fixes and some minor enhancements;
The disclosure triangle for advanced plug-in parameters is now available when the Advanced Tools preference is not enabled.
Pedalboard now has a mono->stereo mode.
Fixes an issue where Audio Unit V3 MIDI plug-ins could show up multiple times in the plug-in list.
Resolves an issue where IRs in Space Designer could be unexpectedly truncated after the project sample rate is changed.

Mixer – various bug-fixes and;
Plug-in insert slots now show a little arrow indicator when plug-ins are using a side-chain input.

Groups – various bug-fixes and;
Group settings now offer an option to create a default set.

Drummer/Drum Machine Designer – various bug fixes and;
Saving a patch based on a new instance of Drum Machine Designer on a track with a custom track name now uses the track name by default.
Drum Machine Designer sub-tracks can now be sorted.

Takes and comping – various bug fixes and;
It is now possible to split multiple selected takes in a disclosed Take folder at the same time.
Splitting or copying Take regions that have been renamed now appends a number to the name of the new segment.
Transpose settings in the MIDI region defaults are now applied to recorded Takes.
Region solo now works for selected Quick Swipe comps in Take folders.
Take Folders recorded over a tempo change are now the correct lengths.

Track Alternatives – various bug fixes and;Recording MIDI to a track showing inactive track alternatives no longer creates aliases on the inactive alternatives.Dragging an inactive track alternative to the area below the last track in the Tracks Area now creates a new track at the expected location and places the region there.

Fades
When a crossfade is edited, the right side of the fade now visibly updates as expected.

Smart Tempo – various bug fixes and;
Logic now displays a warning to switch the Smart Tempo mode to KEEP when starting a MIDI recording with a cycle enabled in AUTO mode in projects that have no tempo reference.
There are new key commands to navigate in the Smart Tempo Editor: Forward by Bar, Rewind by Bar, Forward by Beat, Rewind by Beat, Forward 8 Bars, Rewind 8 Bars.

Sound Library – various bug fixes and;
It is now possible to use an alias to refer to sound library content manually moved to a non-default location.
The Sound Library can now be relocated to volumes on Box.

Content – various bug fixes and;
The setting to enable Patch Merging in the Patch Library is now remembered when the library is closed and then reopened. (Finally!)
It is now possible to filter the Sound Library to show patches from specific sound packs.

Import – various bug fixes and;
When importing Music XML files, Logic now asks whether to import the tempo map or keep the current tempo.
Logic now supports importing the new Final Cut Pro fcpmld XML file format.
Drummer regions are no longer changed to MIDI regions when importing a Drummer track from another project.

Export and bounce – various bug fixes and;
A progress bar now displays when converting multiple audio files to a compressed format in the Project Audio window.
Track numbers are now appended correctly when “Export all tracks as audio files” is performed while one or more Take folders are open.
Add to Apple Loops Library and Export now generates a 24bit audio file.

Auto Sampler – various bug fixes

Key Commands – various bug fixes and;
The Key Command editor now displays Touch Bar icons for those key commands that offer them.
The Key Commands editor now resets any selections when it is closed and re-opened.
It is now possible to assign multiple Key Commands to the same MIDI message.
The “Select muted regions/cells/events” command now only selects muted items within selected regions, or within a marquee selected area.
Unpacking folders and Take Folders is now performed with the same key command.
There is now a key command for Custom Row Name in Step Sequencer.

Global Tracks – various bug fixes and;
Shift-clicking the lower left corner of a Global Track now resets its height, just as with other tracks.

Impulse Response Utility – various bug fixes

Selection-based Processing
Selection-based Processing now works on Take folders.

Smart Controls – various bug fixes

Score – various bug fixes and;
User-created Text Styles can now be deleted from a project.
Notes are now pasted to the correct position in the Score editor in projects that start on a beat sub-division.

Editing – various bug fixes and;
Track automation can now be copy/pasted in the Piano Roll using key commands.
The Event Float window now opens the first time a note is double-clicked in the Piano Roll.
MIDI CC data in the Piano Roll automation lane can now be quantized.
The Event List editor now properly updates to display newly loaded Articulation Sets.

Undo – various bug fixes and;
Undo now works for parameter changes in the Mapped Instrument editor.
Undo now works for routing changes applied to stomp boxes in the Pedalboard plug-in.
Changes to the Surround Panner now create Undo steps.
Changes to Mixer channels with Record Automation with Regions enabled now create undo steps.

Video – various bug fixes and;
If the frame rate of a movie is changed while importing, and the audio is not imported as a separate track, a blue frame indicating the video contains embedded audio is now displayed in the global track as expected.

Logic Remote – various bug fixes.

Control Surface and MIDI controller support – various bug fixes and;
The Control Surface preference window now includes a column to display the Lua script version number.
Control surface buttons now reliably reflect the states of key commands assigned to them.
LUA scripts can now connect to virtual MIDI ports.
MIDI device scripts that contain an image of the device no longer show a generic image for the device in Logic.


General – various bug fixes and;
In Logic pro preferences, rather than all the separate groups of advanced preferences, there’s now a single advanced features tick-box: “Enable Complete Features”.
Better Flex analysis.
Step Input now preserves the MIDI channel sent by an external MIDI device.
The main menu now remains fully functional when the Template Picker window is open.
Engaging Track Protect on an armed audio track will now disarm it.
The “Separate by MIDI Channel” command now uses existing sub-channels of a Multi Instrument.
Sustain pedal events performed during playback now override recorded sustain pedal events.
The playhead now displays at the correct position when switching from Skip Cycle to Cycle mode while playing.
MIDI Modify in Step Input now works with the Musical Typing keyboard.
Quick Help settings can now be accessed directly from the Quick Help button in the Control Bar.
The Clean Up Project command now removes unneeded DUP files resulting from creating audio file backups.
Tracks with MIDI FX plug-ins are no longer silent if frozen in Source Only mode.
Engaging record with a single-tick length Marquee zone no longer engages Auto Drop. (Finally!)
MIDI events in track regions are now displayed more consistently at all vertical track zoom levels.
Hyperlinks added in Notes fields now open a web browser as expected.
There is a new preference setting to adjust Logic’s light/dark appearance independently of the system setting.
Settings in the File Browser are now retained after the Browser is closed and reopened.

Less-obvious features of the Logic Pro X v10.5-10.6.1 Updates

Note: Apart from the major 10.5 update, all the others are mostly bug-fixes.

Yes I know it’s a little late to the gate on this post, but it seems every person and their cat/dog whipped out a review when it was released. So in this review, I will for the sake of completion briefly touch on the new “glamour” features, but I’m also going to look at more of the cool but less-obvious additions.

Although the main focus on the v10.5 update was new features, there were also a slew of workflow and interface optimizations – for example better scrolling, dragging and window centering. Also plug-in and Apple Loop scanning have been sped up significantly. If you use ARA (like I do with Melodyne) it now works much more reliably.

Drag and Drop. Many of the new features within Logic are designed to work with an enhanced Drag and Drop function – it’s so much easier to import samples and drop them into a sampler, Drum Machine Designer, or Alchemy. If you drag files onto a track header, it gives a variety of possible ways to import the sample to the devices listed above, and can include what mode you want to import them with.

Live Loops: This is probably the most dramatic new feature. Logic is now a bit like Ableton Live in that you can now record, compose and perform mixing in cells rather than regions. The cells work with all the usual types – audio regions and samples, MIDI, Drummer and the new Step Sequencer regions. You can switch between the two operational modes per track if you like and you can render a Live Loop performance onto the Main Window tracks. Or copy a region across from either direction. The Live loop window feels like Ableton’s clip view mode laid sideways. There are various ways to trigger the cells individually, or as groups (“Scenes”), with quantization on the start and end triggers, loop length etc. Currently compatible with most of the Novation Launchpad series.

New Live Loops section in Main Window

Sampler and Quick Sampler: The old EXS24 is finally gone, to be replaced by these two new samplers. “Sampler” is effectively the new EXS24, and is compatible with all the old EXS patches. It also has way more features, like flex and the ability to recognise pitch automatically. It also has more filters, more modulation mapping, good zone mapping options, it’s easier to set up round-robins, and better waveform editing. “Quick Sampler” can only have one sample at a time, but it still has a couple of import modes and longer samples can be automatically sliced. Between the two versions there are some excellent features. And they look much better.

Drum Machine Designer: This is a completely new version of DMD that works slightly differently than before. It is still basically a special macro instrument – sort of a track stack with a fancy pad interface, with each pad being assigned to a note and having a separate instrument/channel strip usually populated with a Quick Sampler instance. Apple have made this much easier to use than the old one and also way more powerful, so in a way you could think of it as another sampler option – much akin to Native Instrument’s Battery. They’ve addressed complaints from many users and now one of the cool things you can do with this new version is play/record each pad’s sound on its own MIDI track and pitch it up and down by where you play it on the keyboard.

Auto Sampler: This has been available in Apple’s MainStage for a couple of years now, and has now been ported to Logic. It is a specialised sampler designed for auto-sampling other instruments. It basically sends out a set of MIDI notes (you can decide on how many across the keyboard and whether you want to do velocity layers as well), then it records the result as a set of mapped samples. It can also auto-loop sustained notes. You can use it for external hardware synths, or MIDI instruments, depending on where you place the plugin.

Step Sequencer: The other hyped new device in Logic. Although those of us who come from the early days of Logic will recognize the similarity with the old Hyper Editor window in GM drum mode. This is a much more powerful version of that. Basically it is a highly detailed step editor where you can create tracks and assign notes, or various other features like note repeats, ties and skips. You set the chance a note will play. Each lane can have a different length and even direction. You can use it for drums or to create melodic/chordal patterns. You can even automate parameters within it in step fashion (it can glide between settings though). There is a whole new section in the Apple Loops browser for this features with heaps of new loops.

Drum Synth Instrument: This is like the synth part of Ultrabeat. It has a bunch of different types of drum and percussion sounds (kicks, snares, percussion, cymbals, and hi-hats) that you can tweak. It’s very handy and sounds good.

Remix FX Plugin: Pretty much a “DJ” jammer plugin. It’s actually quite good fun and can be automated and also played using the iPad Logic Remote.

Improved Logic Remote: This has had a bit of a tweak as well, with more functions added.

More content: As usual with these larger updates, Apple have added even more patches. And of course new patches for the new features as well. To quote Apple: Over 2,500 new loops in a variety of instruments and genres covering modern and classic hip-hop, electro house, reggaeton, future bass, techno, and transition effects. 17 Live Loops starter grids covering a range of electronic and hip-hop genres. More than 70 new Drum Machine Designer kits. Over 1,500 new patches. And this Logic version’s demo track is the multi-track project of Billie Eilish’s “Ocean Eyes.” There’s some good tutorials provided for the new features as well.

Cool Less-Obvious Stuff:

MIDI capture when stopped: One of my favourite new features! If you play MIDI while Logic is stopped, you can use the Capture Record button or key command to capture what you just played onto the selected track. It times-out after about 20 secs of not playing anything though. Combine this with Logic’s Smart Tempo editor (which can now use MIDI regions as well as audio) and you can also map your song tempo to the MIDI part you just played.

Content Slip and Rotate in regions: Slip: This menu item and key command allows you to slip the content of an audio or MIDI region left or right within the region boundaries. When you do this with audio it creates a little fake folder that the audio slides within. Note that with this mode, your audio region has to be smaller than the full audio file for it to work – otherwise there’s no extra content to slip with. And as with Take Folders you can Unpack or Unpack and Merge when you’re finished tweaking. Rotate: Almost the same, but now when it disappears off one side of the region it reappears on the other side as you “rotate” the contents. This one works fine with audio regions the same length as the audio file. I’ve been waiting for this feature for years.

Piano Roll Chord Analysis: You can analyse chords in Piano Roll by selecting notes anywhere – you now only need two (or more) notes instead of three. 

Double and Half the cycle and region length: There are now key commands to double and halve the current cycle length as well as region lengths.

Alignment guides now extend into Global Tracks: A position guide line is now displayed when adjusting the left or right edge of a Marker in the Marker Track and the vertical guide line when dragging regions now extends into the Global Tracks.

Record automation with MIDI recording: This is quite a significant one. You can now record a MIDI performance and also automate parameters with automation at the same time. There is a new sector under automation menu.

No more adding key signature changes inadvertently by changing LCD display key: In cases where the project contains only one key signature, adding a key signature in the LCD now always changes the project key signature rather than inserting a change at the current playhead position.

Region drag to create duplicate track: Dragging a region below the last track in the Track List now creates a new track with duplicate settings. It is also possible to copy a track by Option-dragging it below itself in the Track List. (I’m sure I have done this before anyway) – you can do it with multiple tracks though.

Auto-colour Markers: There is a preference for auto-colouring created markers.

Removing fades from audio regions: It is now possible to selectively remove Fade-ins, Fade-Outs, Crossfades or all Fades from the contextual menu on regions.

Extra Smart Control Tabs for Aux and Masters: When you open up the Smart Controls pane, you’ll see some extra tabs for the Aux returns the channel strip is connected to, and the Main out channel strip.

Missing audio files: The Project Audio window now shows the last known path for missing audio files

Upbeat event playback: There is a new menu item “Reactivate Upbeat Event Playback” to allow MIDI notes that are ¼ note or less before the start of a region to play, in cases where the left edge of the region has been edited. Note that having this on can mess with you sometimes as well.

Channel EQ Plugin Updates: Slightly new interface and fixed some bugs and finicky things so it works better. There is now a contextual menu for switching the EQ range, Analyzer Resolution and Analyzer Mode in the extended parameters section. The frequency setting can now be adjusted in finer increments. The vertical scale display now adjusts dynamically, depending on how much boost or cut is applied. The range of the Analyzer in the Channel EQ and Linear Phase EQ is now switchable between 60db and 120 db.

New Key commands:

  • Rotate and slip content of Piano Roll by grid.
  • Can bypass all plugins on a track.
  • Hide all but selected tracks.
  • There are now separate key commands available to apply each possible quantization value.
  • There are now key commands to double and halve the current cycle length.
  • There are now separate Key Commands to select the members of each Group and Key Commands to show/hide up to 64 groups.
  • Color by Articulation.
  • Forward by Nudge Value and Rewind by Nudge Value.
  • Menu Items in the Take Folder drop-down menu now display their equivalent key commands.

Mixer: Heaps of bug fixes and general improvements in responsiveness. You can do a couple more Mixer functions using the channel strips in the Inspector pane on the Main Window as well.

Here’s a bunch of the new Mixer stuff:

  • There is now a key command to bypass all plug-ins on selected channel strips.
  • There’s now 64 mix groups. Option-clicking the Group slot on a channel strip now selects all other channel strips that are members of the same group.
  • It is now possible to see the presets for a plug-in in the Sound Library by Shift-clicking it.
  • Fixes an issue where the click zone to control Stereo Pan is unexpectedly small (This was a real pain but is a lot better now).
  • There are now menu commands to remove all plug-ins, or all bypassed plug-ins, or all empty insert slots or all sends from selected channel strips.
  • Typing a hyphen with a space before and after now forces a line break in a Channel Strip name.
  • Right- or Control-clicking a group slot now opens a contextual menu with group settings.
  • The Pan Law setting now allows for -4.5 dB and -6 dB compensation (This option is in Project Settings).

Name Labels in Piano Roll: Drum names now show up in the piano roll properly.

Apple Loop enhancements:

  • It is now possible to drag a mixed selection of MIDI and audio regions to the Loop Browser.
  • Flex-based transients are now used when regions are exported as Apple Loops.
  • The minimum duration for Untagged Loops to be recognized as loops rather than one-shots has been lowered to 1.7 seconds.
  • Untagged Loops can now be edited in the Smart Tempo Editor.
  • Enabling Follow Tempo on Apple Loops and Untagged Loops now reliably sets their Flex Markers
  • When audio Apple Loops are dropped into project they match the playback level in the loop browser.

Input the tempo of audio files in the Project Audio window. There’s now a tempo column that you can type into to enter the audio file tempo.

Improved Logic Pro Help: Available from the Logic Pro X Help Menu, it is now available in PDF or Apple Books format. This replaces the clunky “help app” pop-up overlay window which was out of date and atrocious to navigate. Importantly – like the original biblical set of paper manuals, it now has a glossary at the end which makes it easier to find terms. As always, there’s a manual for Logic app itself, plus other separate ones for the Logic Pro Effects and the Logic Pro Instruments. There is also an online-only help section for Control Surfaces support.

Cool new additions to Logic Pro X v10.4.6 – v10.4.8

Lately it seems like Logic updates have primarily been about bug-fixes, accessibility improvements (eg improved Voice Over functions) and minor function updates. Perhaps Logic Pro v10.5 is on the horizon – who knows.

All the detailed notes are here.

Dynamic Plug-In Loading.

Enabling the “Only load plug-ins needed for project playback” project setting means that only those plugins and instruments currently needed will be activated on loading the project. These latest updates fix a whole bunch of issues that arose from this cool feature – including things like some third-party sample libraries failing to load after tracks being frozen and weirdness from using objects in Logic’s Environment window.

Mixer

Option-clicking an empty EQ thumbnail on a channel strip now inserts a Channel EQ into the first plug-in insert. Handy!

Stereo width and panning can now be adjusted using the scroll wheel on a mouse. In case you missed this on a previous update – Logic channel strips can now change a stereo balance to a stereo pan knob. If you Command-click on a stereo pan, you can swap left and right sides.

VCAs can now be stored as part of the User Default channel strip configuration. VCAs are awesome and keep an eye out for an upcoming tutorial on how to use them.

Automation

Using Option + Shift to create a ramp when dragging automation now works consistently.

Audio Unit v3 plugins can now be automated, and Logic’s automation will handle third-party plugins and instruments much more reliably.

Export/Bounce

It is now possible to bounce a track in place in a project that has not yet been saved. Although we all save our projects first, eh?

Highlights of Logic Pro X v10.4.5 Update

It wasn’t quite the Logic v10.5 update we were all hoping for, but this is still a pretty solid update nonetheless.

Here’s some of the main features:

More Tracks

Lots of tracks. 1000 of each type! 256 of each of Audio or Instrument tracks has usually been enough for me, but apparently power-users and film soundtrack people still ran out. So now we have 1000 of each type of track, and this also includes 1000 Aux channels strips and 1000 external MIDI tracks as well.

And since this huge number of tracks becomes hard to navigate in the Main window, you can (via the Preferences/Display/Tracks “Show Track or Bar Number While Scrolling”) turn on a pop-up display that shows which track you’re scrolling down to as you go (and the same for Bars when scrolling sideways).

In related Mixer window news, Apple have increased the number of sends per channel strip to 12 – up from the 8 we used to have. Nice.

They’ve also finally added a “User Default” setting for the Mixer’s “Configure Channel Strip Components” menu. Since they already had this handy User Default feature for the Track Header, Control Bar and Display and the Toolbar, it was always something I bemoaned as missing. Especially as I would always have to go and tweak a few things manually – like making three lines for the Track Name instead of one. Try it!

Oh and now apparently you can get rid of all those pesky External MIDI tracks that you don’t need in the “All” view in the Mixer.

Performance and Responsiveness

This is where Apple seem to have spent significant time and energy in the latest release, as the overall performance and responsiveness has improved amazingly in Logic. Things like starting up Logic, and scrolling, opening or switching windows is much faster and more responsive, especially with Mixer and Event list views.

Apple have optimized Logic’s performance ready for the new Mac Pro including support for up to 56 threads.

Alongside this, there are some options for controlling loading and unloading of plug-ins. For example, Option-clicking the On/Off button for a track now loads/unloads the plug-ins on the channel strip, and Freezing a track now unloads its plug-ins to free up resources.

The new project setting “Only load plug-ins needed for project playback” reduces load times for large projects or templates.

Projects with numerous Flex Time edits and/or tempo changes perform much more efficiently.

Plug-ins

“De-esser 2” is a new de-esser plugin with extended features such as relative level sensing for reducing sibilance problems on vocals and hihats and suchlike. Looks like it is a lot better than the fairly basic original Logic de-esser.

The Expander plug-in has had a retina facelift and the resolution of the Sculpture interface has also been increased – it looks really nice again. I guess Apple are still slowly working their way through the instrument and plug-in catalogue and zhooshing them all up.

MIDI Stuff

You can now send MIDI clock or MIDI Time Code to up to 16 different MIDI ports, each with its own timing offset and plug-in delay compensation.

Not sure if it was added in the this update or the previous ones, but I notice that you can now export All MIDI Tracks as a MIDI File. The old method just had export of MIDI “selection”.

Automation

The display of automation point values has been improved at low zoom levels.

When regions with region-based automation are split, automation points are now added to the right-hand region to maintain consistent playback.

Pan or Volume Automation written in Touch mode is now reliably shown when adjusted using the Track Header controls.

Operational Improvements

The Loop Browser can filter by loop type (Audio/MIDI/Drummer) via a little button above the Loop icons, and also allows drag-and-drop of multiple loops into your project simultaneously. Other enhancements include: It is now possible to drag more than one folder simultaneously into the Untagged Loops browser. Apple Loops now continue to loop after jumping to a different position while previewing. Preview apparently now sequentially plays all selected loops in the Loop Browser but I couldn’t make this happen.

Shift-double-clicking the background of the Tracks area now toggles playback from the clicked position – very handy!

Clicking on Flex Pitch notes now makes a sound. I’m sure it used to do this at one point anyway. Or maybe that was just Melodyne.

The Mixer now offers an option to disable its automatic scrolling to channel strips of selected tracks. This can be handy on large sessions.

The Recording section of Project Settings offers a new option “Auto-erase Duplicates”, which removes duplicate MIDI notes at same playback position when merge recording MIDI in cycle mode. So you don’t that huge clumping of overlapped notes so much.

Pressing Option + Shift while rubber-band selecting in the Piano Roll now creates a new Time Handles selection.

If all the currently selected tracks are routed to a bus, creating a Summing Stack from them now creates an Aux routed to the same destination.

The list of key sources in the plug-in side chain menu is now sorted into sub-menus by audio channel type (eg Input, Instrument, Bus)

The number of available busses for Multi-Output Audio Unit software instruments has been increased to 25.

Voice Over has a lot more control over Logic functions.

A bit more awereness of Cycles and markers has been added – there is now a key command “Create Marker by Cycle Area.” Finally! And the “Play From Selection” key command now takes selected markers into account.

There is now a key command “Copy Section between Locators (Selection).”

There are new key commands “Nudge Selected Parameter Up” and “Nudge Selected Parameter Down.” Apple have also integrated the nudge and transpose key commands that apply to MIDI notes, automation control points, and regions in the Tracks area. Mostly it uses combinations of Option & up/down/left/right arrow keys to either nudge left and right or transpose up and down. Add Shift for octaves up and down.

Key Commands that specifically affect region automation now function on all selected regions, even if some of those regions are on tracks currently set to display Track-based automation.

The focused track in a group of selected track is now always indicated when color bars are displayed, and when track numbers are not displayed in the Track Header.

Stability and Bug fixes

A lot of items that caused random crashes in Logic have been fixed – including a quite a few ARA2-related things.

And as usual there are too many bug fixes to list here individually (go here for the full list), but some of the ones I think are important are lots of Flex Time and Flex Pitch improvements, and ARA now seems to be able to handle things like Project Alternatives and project and audio file duplication.

ARA edits are now reliably saved in projects created from project templates and are reliably maintained when Save As is used. About time!

Smart Tempo and Flex and Follow have had a heap of tweaks and fixes as well.

Logic now apparently correctly plays back all channels of third party ambisonic audio files.

The EXS24 now consistently finds samples in those cases where the samples are in the project package and the EXS instrument file is in the User Library.

It is now possible to undo IR file selection in Space Designer, and the Wet control now automates properly as well.

Undo/Redo and Compare support with Audio Unit plugins is improved.

Plug-ins again consistently load their default settings when instantiated.

“Save as” now always defaults to the current project type (Package vs. Folder).

Conclusion

This is a pretty solid Logic Pro X update from Apple. I’ve had a quick play with some of my larger projects using this version, and they do seem a lot more responsive.

There’s still a few niggles that I’m hoping that they’ll address sometime soon- the perennial desire to be able to move tracks in the mixer, for example. And the magic Single Undo history feature has vanished.

Omnisphere v2.6 Update Released

Spectrasonics just released the v2.6 update for Omnisphere.

Ooooh D-50 Fantasia sounds – I’m in love with the 80’s!

It has some cool new features:

  • The updated list of supported hardware now supports 65 hardware synths as controllers for Omnisphere – including the Roland D-50. This also means matching hardware sounds in Omnisphere for these synths. BTW – you don’t actually need any of these synths to access their hardware samples in Omnisphere – although it’s even cooler if you can. There’s 1,600 new patches in the Hardware Library.
  • The Arpeggiator has been greatly upgraded with some cool new features, plus you can drag and drop MIDI patterns.
  • The Synthesis engine has been upgraded, with more layers per patch, more filters, more LFOs, more wavetables, enhanced granular synthesis, and improved control over modulation routing.
  • Drag and drop your own samples onto the interface to add them. Much simpler.
  • More sounds – 14,000 so far.
  • More effects units. There’s now 57.
  • High-resolution graphics.
  • Live mode interface for touch screens
  • Enhanced Orb with attractor mode.

So – there’s plenty there to play with. I’ve already written a new (slightly-80’s) song within 24 hours of the update release just playing with some of the new patches.

If you already have Omnisphere 2, download this free update. If you don’t have Omnisphere 2 yet – it’s worth every penny just to have access to all those rare and expensive hardware synths.

Logic Pro X v10.4.3-10.4.4 feature highlights

These two Logic Pro X updates were definitely in the bug-fix category. There were numerous glitches that were fixed. See here for more details.

For those of you who had tried using Logic v10.4.2 with ARA2 and Celemony Melodyne v4.2.1, there were some serious issues that appeared around suddenly losing all your Melodyne edits when opening a project and “saving-as” without hitting Play first.

This mostly appears to be fixed but there’s still some problems that haven’t yet been completely sorted yet. There’s still some oddities with not being able to import tracks with Melodyne ARA plugins, plus not all the issues have been resolved with Track Alternatives and Melodyne ARA.

Actually, I notice there’s still some bus-routing problems with importing Track Stacks from other projects as well.

Apart from bug-fixes, there were no new features apart from a new MIDI port-based input filter in the MIDI Preferences.

MIDI input port filter preference pane – the “IAC Driver From Logic” should be disabled as an input.

Quite handy really, especially if you’re doing some tricky MIDI routing between audio apps or plugins using IAC (Inter-Application Communication) busses and the like. By default, Logic just accepts every MIDI input, so it’s very useful being able to turn off a bus that’s for sending data from Logic so it doesn’t create a MIDI feedback loop. Up until now, it meant some trickery with patching to fake objects in the MIDI Environment.

The MIDI window in Audio MIDI Setup.

Here’s hoping Apple fixes a few more of these niggles next time around.

Logic Pro X v10.4.2 Update Released – Main Features

This latest Logic Pro X update doesn’t have a heap of new items – it’s mostly just (always welcome) bug fixes plus a few subtle but quite powerful tweaks.

SOUND LIBRARY RELOCATION

Probably the biggest yet simplest one is the ability to move Logic’s huuuuge Sound Library elsewhere. You’ll still need some space on your main drive as it caches the downloads before moving them. This must be one of the biggest demands from users over recent years, what with shrinking drive sizes on laptops (expensive SSDs mainly) and the ever-expanding Sound Library. I just looked and it’s currently about 57GB with all the legacy stuff included.

Relocate Sound Library Menu


Sound Library Browser


SMART TEMPO ENHANCEMENTS

The most complex addition is probably the bunch of new features in Smart Tempo. Now you can detect tempo across multi-track audio files – no doubt very handy for importing full studio recording projects from elsewhere. You can even select which files will be analysed for the resulting tempo calculation. The (newly-renamed) Smart Tempo editor allows you to edit each individual audio track detection or a combined down-mix file.

You can also analyse and edit Logic’s tempo and time signatures based on MIDI regions that weren’t played to a click track.

Logic Pro Tempo detection from MIDI Region

Plus it looks like there’s also some extra options on the Project Settings/Smart Tempo pane that allow auto creation of edit groups on import and some options for exporting tempo.

Smart Tempo Project Settings


AUX SEND ENHANCEMENTS

For those that do a lot of recording and mixing in Logic – Apple have added some awesome Aux-send capabilities.

Firstly, the ability to directly create an aux send to an output without having to go through a bus.  This is perfect for creating headphone sends.

You can even use a menu command to match the channel-strip’s current fader and pan positions to the send – again a fairly normal way of starting off a headphone mix.  On a related note – you can now have an independent pan for each send. Again this is perfect for headphone sends, but also useful when sending to stereo effects where you want to go into one specific side. You could always control this to some extent by making the aux send post-pan, but this would just follow the channel-strip pan. The actual control of the new Independent Pan can only be done when you enable the mixer’s new Sends to Faders mode. There’s a new button/selector at the top of the mixer just for this.

Logic New Aux Send Features

What this mode also does is make the Channel Fader control the selected Aux Send, and the Channel Pan control the selected Aux Send pan.

This means a couple of things; You can now use the Fader (or a connected control surface fader) to control an Aux send level accurately, and with the panning you can do cool stuff like pan the Channel strip left and the the Aux Send right and potentially get some fancy stereo stuff going on. I just tried it with Step FX and it was quite cool.

ALCHEMY HOTSPOTS

As usual, Alchemy got some more love this time around. You can now drag audio files directly onto a Sources panel and each contains hotspots for Additive, Granular, Spectral and Sampler import.

Alchemy Drag and Drop Hotspots

So all in all some cool stuff. See the Release Notes for the full picture.


Logic Pro X update v10.4 released – with some cool new features

My friend sent me a text that woke me up that simply said. “10.4!!!!”. Of course I instantly knew that he meant a new release of Logic Pro X.

I always love a new Logic release – it’s like my birthday! What new toys are there to play with? Then my engineering brain steps in and it’s all “what new functions are there to improve my workflow?” . Boring.

And then I struck my first problem – I couldn’t even see the Logic update in the App Store. Maybe Apple were doing a staggered notification to ease the server load? “Zed” is probably last on the list. Nope. A bit of searching revealed that you need at least macOS Sierra to install this version of Logic. I should have twigged as this same issue came up recently with latest FCP-X version as well (which I ignored). I have been sitting on OSX El Capitan due to some requirements with my official place of employment and also due to learning to avoid the bleeding edge by changing an OS during projects. Projects never seem to end as they all overlap. Solution – install macOS Sierra onto another boot drive and keep El Capitan just in case.

So that was a good chunk of a day gone after having numerous extra updates, scanning all my old third-party plug-ins again, fixing the broken ones, and downloading all the extra gigabytes of Logic Pro X content. But we got there in the end, and finally I could open up the new Logic Pro X version 10.4 .

Hurrah! By the way – in case you never noticed, Logic always comes with a demo project – this time it’s Beck’s Colors. It’s nice to open something first that only uses Logic plugins so there’s no weird issues.

Tempo-Matching

As a relatively major update, Logic has added several major improvements. Probably the biggest is the new tempo-matching feature. This feature makes it a lot simpler to bring together audio files of different tempos into the same project, or you can do things like easily match imported files to a track played without using a metronome. There’s been the ability to do this sort of thing in Logic previously by combining tools such as Flex time, detect Tempo and Beat Mapping but it was often intricate and fiddly. Apple have unified these things as a kind of simplified macro system – just like they did with the old “Replace or Double drum track” feature.

Tempo Matching Controls and Project Settings

File Tempo Edit Tab
File Tempo Edit Tab

Tempo-matching features are embedded into the entire Logic Pro X application – in the top display/tool bar, in the Project Settings, and there’s a whole new File Tempo edit tab just for tweaking detection and how you want Logic to behave regarding it. It’s a complex feature that I’m going to experiment with and might do a full article on later.

There’s also a bunch of new plug-ins and instruments.

EQ

Logic Pro X Vintage EQs
Vintage EQs

Three essential models of vintage EQs are included – Vintage Tube EQ (a Pultec clone), Vintage Graphic EQ (an API clone) and Vintage Console EQ (a Neve clone). They sound pretty nice at first listen (each has several options for tweaking coloration of sound including a linear phase mode) but I’ll need to do a bit of a test against some other modelled EQ plugins of the same type before I can really tell how good they are. Pretty darn cool to have these included in Logic Pro – now there’s finally something to match the vintage compressor models.

Reverb

Reverbs have had a bit of shake-up this time around, with the poor old PlatinumVerb being relegated to Legacy bin (BTW all the old legacy plugins are still available in Logic by hitting Option then clicking on a plug-in slot).

Space Designer has a had a facelift – a brand new “flat” interface that looks quite tidy. Otherwise much the same as it was before.

New Space Designer Interface

The new kid on the reverb block is ChromaVerb. This has 14 different tweak-able reverb algorithms and it sounds pretty good – especially if you switch the quality to “Ultra” mode.  It’s good to see it has some cool musical features like beat-sync-able pre-delay and decay settings. Plus a slider to mono-ise the low end of the reverb. Lots of EQ and even a damping EQ to tailor the reverb decay at different frequencies.

ChromaVerb Interface

It’s also meant to have a cool real-time visualization of the reverb but it doesn’t work on my old laptop. Sad face.

Multi Effects

There’s a new category of plugin called Multi Effects which has two new plugins: Phat FX and Step FX. These, as you can probably guess, are combinations of various types of effects within the same unit. Phat FX has combinations of filters, compression, distortion, enhancers and the like, while Step FX biases towards delays, reverbs, filters and modulation effects.

Multi Effects Phat FX and Step FX

The Step FX also has a built-in step editor so you can get some groove-based effects going on. A quick browse through the patches shows that there’s some cool and wild sounds from both of these plug-ins. Could be quite inspiring.

Instruments

Apart from adding the usual slew of extra features to Alchemy, plus a bunch of extra filters to Retro Synth (these are actually pretty cool), there’s a bit of “re-bundling” been going on. As usual with Apple there’s always some added-value when this happens.

For example, the Mellotron patches have now been  bundled into a new instrument called Vintage Mellotron. It has some cool extra features too. You can blend between two different sample patches and there’s octave buttons for each patch and some control over the sound quality with tape speed and tone controls.

Vintage Mellotron Instrument


Studio Horns and Studio Strings

Another re-bundled pair of EXS-24 sets of Brass and Strings patches, these two are so much better than you’d imagine. Actually they’re my favourite thing right now. Not only have they improved and expanded the number of the recorded samples, you can play while dynamically switching between articulations (eg Sustain, Staccato, Pizzicato, Drops, Trills etc playing styles). The cool thing about the Articulation attribute is that it is attached to a MIDI note, so any note can be switched between any available articulation, giving great control over phrasing.

Studio Strings Articulation Selection

Studio Strings Instrument Selection

Studio Horns Instrument Selection

Studio Horns Articulation Selection

Editing a recorded Articulation is simple – where you could only do it in the Event List editor, now you can do it in the Piano Roll editor which has been given an extra Articulation selector (if Articulation is detected).

By the way – you need to select an articulation set in the Track Inspector first. Took me about half an hour to work that out.

Apple has really spent some time thinking about Articulations and have upgraded and standardized their implementation of Articulations within Logic. You can apparently customise the mapping of articulations to work with third-party instruments, although I haven’t explored that aspect yet.

Other Stuff

There’s a huge bunch of bug-fixes and enhancements. Check out the full release notes HERE if you’re interested. But here’s a few other highlights:

Marquee tool pop-up shows the length of selection. Finally! Yes!

You can normalize the gain of selected audio clips to either peak or loudness targets – including -23LUFS.

Two new drummers (Austin and Tyrell) with brush-based kits. No reggae beats yet, Apple? C’mon.

You can now choose to undo mixer and plug-in changes.

There’s some major changes to MIDI draw in the Piano Roll – this is now integrated with the Automation system. More on this in another post.

Heaps of new Apple Loops (The new brush-based Drummer loops, Future Bass, Reggaeton Pop)

You can now link plug-ins in “multi” link mode so that when you select another track it’ll show all multi-selected plug-ins for that track.

“Visions” Cinematic presets for Alchemy.

Untagged Loops browsing in Apple Loops browser (ie just regular audio loops from CDs and stuff without the Apple Loop metadata added.)

Improved grouping functions and VCA fadering.

You can bookmark other locations in the File Browser (Yuss!)

The Direction Mixer plug-in now includes a crossover.

That’s probably more than enough, eh?